Are you tired of your files scattered all over your Mac? Do you spend precious time searching for documents, photos, or videos? It’s time to take control of your digital clutter and organize your files like a pro.
In this article, we’ll show you how to make a folder on your Mac, step-by-step. With a few simple clicks, you’ll be able to create a system that makes finding and accessing your files a breeze. We’ll also share essential tips and tricks for navigating the Finder, along with best practices for organizing files within folders. Plus, we’ll introduce you to the power of tags and labels for enhanced organization.
Whether you’re a student, a professional, or just someone who wants to declutter their digital life, this article will empower you to become a master of file organization on your Mac.
Key Takeaways
- Creating folders on Mac is easy and can be done through right-clicking or using a keyboard shortcut.
- Organizing files in folders allows for quick and efficient access.
- The Finder search bar can be used to quickly find files by name or content.
- Using tags, labels, and smart folders can enhance file organization and make them more searchable.
Understanding File Organization on Mac
Get ready to level up your file organization game on your Mac by understanding how files are organized. Don’t worry, it’s not as complicated as it may seem.
When you save a file on your Mac, it goes into a folder called ‘Documents’ by default. This folder is located in your user directory, which is named after your username.
Inside the ‘Documents’ folder, you can create subfolders to further organize your files. For example, you can have separate folders for work, personal, or school-related documents. Folders can be nested inside other folders, allowing you to create a hierarchical structure that suits your needs.
By organizing your files in this way, you’ll be able to find what you need quickly and efficiently, saving you time and frustration.
Navigating the Finder: Essential Tips and Tricks
Mastering the art of navigating the Finder on your Mac can greatly enhance your file management skills. To start, familiarize yourself with keyboard shortcuts. Pressing Command + N will open a new Finder window, while Command + Shift + N creates a new folder instantly.
If you prefer using the mouse, try right-clicking on a folder to access a range of options, such as renaming, duplicating, or moving it.
To quickly jump to a specific location, use Command + Shift + G and enter the desired path.
Additionally, the sidebar can be customized to display frequently accessed folders, making it easier to navigate.
Lastly, take advantage of the search bar located at the top-right corner of the Finder window to quickly find files by name or content.
Mastering these essential tips and tricks will make navigating the Finder a breeze.
Step-by-Step Guide to Creating a Folder on Mac
By following this step-by-step guide, you can effortlessly create a new folder on your Mac, allowing for seamless organization of your digital assets. Here’s how to do it:
- Open a Finder window by clicking on the Finder icon in your dock or by pressing Command + N.
- Navigate to the location where you want to create the folder.
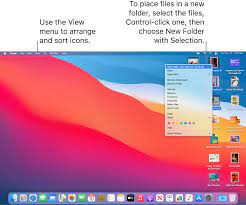
- Right-click on an empty space and select ‘New Folder’ from the dropdown menu.
- Alternatively, you can also press Shift + Command + N to create a new folder directly.
- A new folder will appear with the default name ‘untitled folder.’ Simply type in a name of your choice to rename it.
- Press Enter to save the new folder with the given name.
Now you have successfully created a new folder on your Mac, ready to be filled with your files and documents. Happy organizing!
Organizing Files within Folders: Best Practices
Effortlessly keep your digital assets in order by implementing these best practices for organizing files within folders on your Mac.
Start by creating a logical folder structure that reflects your workflow and makes it easy to locate files. Use descriptive and concise names for your folders, avoiding generic names like ‘Miscellaneous’ or ‘New Folder.’ Instead, be specific and use names that accurately describe the contents of the folder.
Within each folder, organize files using subfolders or categories, such as ‘Work,’ ‘Personal,’ or ‘Projects.’ This will further streamline your file organization and make it easier to navigate.
Additionally, take advantage of tags and labels to add metadata to your files, making them even more searchable.
Regularly review and clean up your folders, deleting unnecessary files and keeping everything tidy.
By following these best practices, you can efficiently manage your files and stay organized like a pro on your Mac.
Utilizing Tags and Labels for Enhanced Organization
Utilizing tags and labels on your Mac can revolutionize the way you organize and access your digital assets. It adds a layer of enhanced organization that streamlines your workflow. With tags, you can easily categorize files based on their content. This makes it simple to search and retrieve specific items whenever you need them.
By assigning labels, you can visually differentiate between different types of files. This makes it easier to identify and prioritize certain documents. To add a tag or label, simply right-click on a file or folder and select the appropriate option from the dropdown menu. You can also create custom tags and labels to suit your specific needs.
With this powerful organizational tool at your disposal, you’ll be able to find and manage your files like a pro.
Advanced File Management Techniques for Mac Users
Mastering advanced file management techniques on your Mac can transform the way you handle and access your digital assets, elevating your organizational skills to the next level.
One powerful technique is using Smart Folders, which automatically gather files based on specific criteria you set. This allows you to quickly locate files without manually sorting through countless folders.
Another technique is utilizing keyboard shortcuts to navigate and manage files more efficiently. For example, pressing Command + Space allows you to instantly search for files by name, while Command + Option + T lets you quickly tag selected files.
Additionally, you can create custom Automator workflows to automate repetitive tasks, saving you time and effort.
By implementing these advanced file management techniques, you can become a true Mac file organization pro.
Frequently Asked Questions
To change the default folder icon on your Mac, simply right-click on the folder and select “Get Info.” Then, click on the current icon at the top left corner, press Command + V to paste a new icon, and finally, close the window.
Yes, you can create subfolders within a folder on your Mac. Simply right-click on the folder, select “New Folder,” and give it a name. This helps you further organize your files.
Yes, you can password protect a folder on Mac. Simply right-click on the folder, select “Get Info,” click the padlock icon, enter your password, and then check the box that says “Encrypt contents.”
To quickly search for specific files or folders on your Mac, use the Spotlight search feature. Simply press Command + Spacebar, type in your search term, and the results will appear instantly.
Conclusion
In conclusion, creating and organizing folders on your Mac is a simple yet essential skill that can greatly enhance your productivity. By understanding how file organization works and utilizing the features of the Finder, you can easily create folders and keep your files neatly arranged.
Remember to follow best practices for organizing files within folders, and take advantage of tags and labels for even more efficient organization. With a little practice, you’ll become a pro at managing your files on your Mac.